Live sound venues and events can be a chaotic environment where things that seem to work just fine in one place don’t work at all the next night in another venue (or ten minutes after sound check in the same venue). Having a number of microphones and techniques for using them in your bag of tricks can prevent a whole lot of panic when you need immediate solutions.
The overall goals of miking techniques for live sound are easy enough to understand: get a good sound on the source that you’re miking, avoid picking up other sound sources in close proximity and prevent feedback. Sounds simple, doesn’t it? It turns out that choosing and using microphones is both an art and a science that can take years to fully master. Here are a few tips to get you started.
Choosing the Right Mics
Choosing microphones for live sound has different criteria than that you’d use for studio recording. Your first big choice is the main classes of microphone types: dynamic versus condenser. Dynamic mics are more rugged and more likely to handle the rigors of live use. They also handle higher SPL (sound pressure level, a.k.a. the loudness of the signal) better than condenser mics. However, condenser mics as a whole provide a much higher degree of sensitivity and fidelity to the original signal, along with extended high-frequency response.

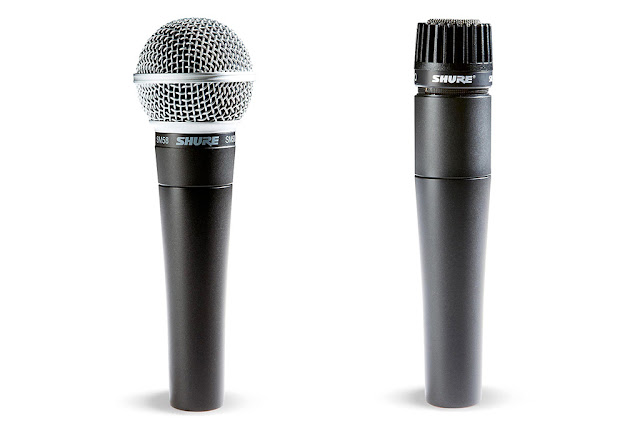
The most classic live sound reinforcement microphones are the Shure SM58 and SM57. Used on everything from lead vocals to snare drums to guitar amplifier cabinets, nearly every venue, live band, and touring company has a good number of these relatively inexpensive, reliable tools for live sound.
Giving Direction
Each microphone has a specific sensitivity to sound coming from various directions, known as the mic’s polar pattern. In most mics, this is permanently built into its design, while in others, different types of directionality can be selected on the microphone itself.
The main types are omnidirectional (which pick up sound equally in a 360-degree radius) and unidirectional (which pick up sounds from certain directions while rejecting others). These mics have polar patterns like cardioid, super-cardioid and hyper-cardioid. This can be tremendously useful in a stage setting. Let’s say you’re miking a horn section, but the guitar amp is nearby. Simply using a mic with a cardioid polar pattern instead of an omni mic will help reject the guitar from bleeding into the horn signal.

This graphic, courtesy of Shure, shows a 3-D representation of omni, cardioid, and hypercardioid polar patterns. You can see the direction from where each pattern picks up and rejects signals.
Pad It Down, Roll It Off
Some mics have a built-in attenuator (“pad”) that allows you to instantly lower the signal by a preset amount, which is handy when dealing with loud sources like kick drum. Some mics may also have a low-frequency filter which helps to reduce the inevitable background noises—feet stomping on stages, wind, audience sounds and more. Pads and filters can really come in handy in a live setting.
Danger Zones
There are some common problems in live sound that are based on the way you use microphones. One is proximity effect, where a mic behaves differently when positioned very close to the source. When you do a sound check with lead singers, make sure they are using the mic just as they do during the performance.
Another caution area is using multiple mics. Unless you have a good understanding of mic placement, you may run into audible issues like phase cancellation and comb filtering. Problems generally occur when two or more mics are placed on the same source at different distances. Use only the mics you need. Learn the “3-to-1 rule,” which says that the distance between the mics should be three times the distance to the source.
General Good Ideas
First, never point a microphone in the direction of a PA or monitor speaker, which is the fastest way to cause feedback. Second, use directional microphones whenever possible, since you can orient them toward the source, helping to get a good signal, reject leakage from other sound sources and avoid feedback.
Perhaps the most important concept for live sound miking is that even a slight repositioning of a microphone can make a big difference. Don’t be afraid to experiment by moving the mics slightly to solve issues.
Quick Mic Choice and Technique Guide
Vocals: Dynamic mics are still the most popular choice here, and there are a wide variety of impressive handheld vocal mics from manufacturers like Sennheiser, Neumann, Electro-Voice, Beyerdynamic, Audix and Blue, in addition to the ubiquitous Shure SM58. Since every vocalist's voice and mic technique is different, it's good to keep a variety of mics available.

Some live sound vocal mics include the Beyerdynamic TG V96c, Sennheiser e965, Shure KSM8, Audix OM11, Blue enCORE 300, and Electro-Voice RE16.
Drums: While kits can be miked effectively with as few as three mics, you'll get better control over the overall sound with a pair of condenser mics as overheads, and closely placed dynamic mics for the rest of the kit. The kick drum needs a mic that can stand up to very high SPL. The snare mic is the one most likely to be inadvertently hit by the drummer, so make sure it's something especially sturdy, like a Shure SM57. Usually the snare mic picks up enough of the high hat, but you can supplement that with a small-diaphragm condenser for extra sizzle.

Choices in drum mics include kick drum mics like the AKG D12VR and the Heil PR48. A longtime go-to mic for toms is the Sennheiser MD421.

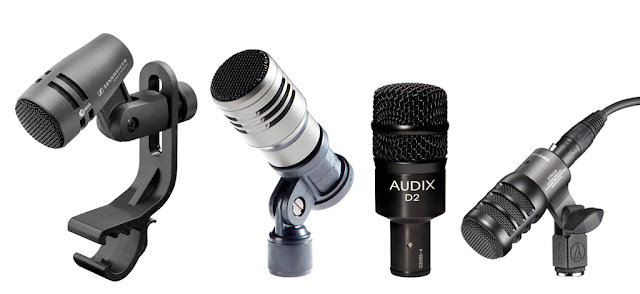
Some snare and tom microphones can be easily mounted to the drum shell or other convenient attachment point, like the Sennheiser e604, CAD TSM411, Audix D2, snd Audio-Technica ATM230.
Guitars: For electric guitars, a unidirectional dynamic mic placed 1–4" from the grill is standard. Close to the center of the cone gives you more highs, and you can mellow a "spiky" amp by moving the mic towards the edge of the speaker or using a modern, sturdy ribbon mic. For acoustic guitars without built-in preamp/pickup systems, try a small-diaphragm condenser about 6" from the sound hole, slanted towards the top edge of the fretboard. Bass guitars are frequently covered with a D.I. (direct injection) box, but if miked, the same type of mic used for kick drum would be preferred.

There are many mics that can be used for miking guitar amplifier speaker cabinets, like the Royer R-122 MKIIL and the Sennheiser e906. Miking live acoustic guitars is a little more challenging; try out the Shure SM81, Neumann KM 184, or the Mojave Audio MA-101fet.
Piano: To cover the full range of a grand or upright piano, you need a pair of mics, usually small-diaphragm omnidirectional condensers. Best placement is inside the lid, about a foot from the strings and about the same distance away from the hammers, one covering the bass strings and the other handling the treble strings. Remember the "3-to-1 rule" when placing these mics.
The final tip is to use your ears and adjust mic positions to try and solve problems before resorting to EQs or plug-ins. The better you get it to sound without adding processing, the better the final sound will be.

No comments:
Post a Comment