Wednesday, November 23, 2016

Mic Choice and Techniques for Live Sound

guitar center professional, live sound, microphones, gc pro
Live sound venues and events can be a chaotic environment where things that seem to work just fine in one place don’t work at all the next night in another venue (or ten minutes after sound check in the same venue). Having a number of microphones and techniques for using them in your bag of tricks can prevent a whole lot of panic when you need immediate solutions.

The overall goals of miking techniques for live sound are easy enough to understand: get a good sound on the source that you’re miking, avoid picking up other sound sources in close proximity and prevent feedback. Sounds simple, doesn’t it? It turns out that choosing and using microphones is both an art and a science that can take years to fully master. Here are a few tips to get you started.

Choosing the Right Mics
Choosing microphones for live sound has different criteria than that you’d use for studio recording. Your first big choice is the main classes of microphone types: dynamic versus condenser. Dynamic mics are more rugged and more likely to handle the rigors of live use. They also handle higher SPL (sound pressure level, a.k.a. the loudness of the signal) better than condenser mics. However, condenser mics as a whole provide a much higher degree of sensitivity and fidelity to the original signal, along with extended high-frequency response.
guitar center professional, live sound, microphones, gc pro
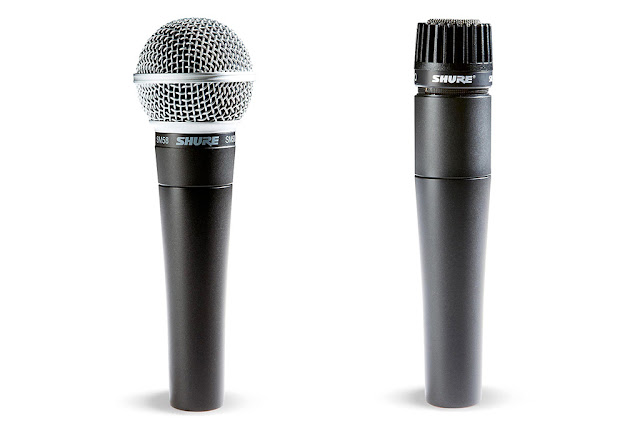
The most classic live sound reinforcement microphones are the Shure SM58 and SM57. Used on everything from lead vocals to snare drums to guitar amplifier cabinets, nearly every venue, live band, and touring company has a good number of these relatively inexpensive, reliable tools for live sound.

Giving Direction
Each microphone has a specific sensitivity to sound coming from various directions, known as the mic’s polar pattern. In most mics, this is permanently built into its design, while in others, different types of directionality can be selected on the microphone itself.

The main types are omnidirectional (which pick up sound equally in a 360-degree radius) and unidirectional (which pick up sounds from certain directions while rejecting others). These mics have polar patterns like cardioid, super-cardioid and hyper-cardioid. This can be tremendously useful in a stage setting. Let’s say you’re miking a horn section, but the guitar amp is nearby. Simply using a mic with a cardioid polar pattern instead of an omni mic will help reject the guitar from bleeding into the horn signal.

guitar center professional, live sound, microphones, gc pro
This graphic, courtesy of Shure, shows a 3-D representation of omni, cardioid, and hypercardioid polar patterns. You can see the direction from where each pattern picks up and rejects signals.

Pad It Down, Roll It Off
Some mics have a built-in attenuator (“pad”) that allows you to instantly lower the signal by a preset amount, which is handy when dealing with loud sources like kick drum. Some mics may also have a low-frequency filter which helps to reduce the inevitable background noises—feet stomping on stages, wind, audience sounds and more. Pads and filters can really come in handy in a live setting.

Danger Zones
There are some common problems in live sound that are based on the way you use microphones. One is proximity effect, where a mic behaves differently when positioned very close to the source. When you do a sound check with lead singers, make sure they are using the mic just as they do during the performance.

Another caution area is using multiple mics. Unless you have a good understanding of mic placement, you may run into audible issues like phase cancellation and comb filtering. Problems generally occur when two or more mics are placed on the same source at different distances. Use only the mics you need. Learn the “3-to-1 rule,” which says that the distance between the mics should be three times the distance to the source.

General Good Ideas
First, never point a microphone in the direction of a PA or monitor speaker, which is the fastest way to cause feedback. Second, use directional microphones whenever possible, since you can orient them toward the source, helping to get a good signal, reject leakage from other sound sources and avoid feedback.

Perhaps the most important concept for live sound miking is that even a slight repositioning of a microphone can make a big difference. Don’t be afraid to experiment by moving the mics slightly to solve issues.

Quick Mic Choice and Technique Guide

Vocals: Dynamic mics are still the most popular choice here, and there are a wide variety of impressive handheld vocal mics from manufacturers like Sennheiser, Neumann, Electro-Voice, Beyerdynamic, Audix and Blue, in addition to the ubiquitous Shure SM58. Since every vocalist's voice and mic technique is different, it's good to keep a variety of mics available.


Drums: While kits can be miked effectively with as few as three mics, you'll get better control over the overall sound with a pair of condenser mics as overheads, and closely placed dynamic mics for the rest of the kit. The kick drum needs a mic that can stand up to very high SPL. The snare mic is the one most likely to be inadvertently hit by the drummer, so make sure it's something especially sturdy, like a Shure SM57. Usually the snare mic picks up enough of the high hat, but you can supplement that with a small-diaphragm condenser for extra sizzle.

guitar center professional, live sound, microphones, gc pro
Choices in drum mics include kick drum mics like the AKG D12VR and the Heil PR48. A longtime go-to mic for toms is the Sennheiser MD421.
guitar center professional, live sound, microphones, gc pro
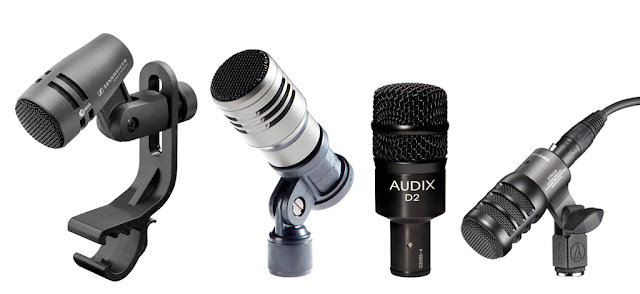
Some snare and tom microphones can be easily mounted to the drum shell or other convenient attachment point, like the Sennheiser e604, CAD TSM411, Audix D2, snd Audio-Technica ATM230.

Guitars: For electric guitars, a unidirectional dynamic mic placed 1–4" from the grill is standard. Close to the center of the cone gives you more highs, and you can mellow a "spiky" amp by moving the mic towards the edge of the speaker or using a modern, sturdy ribbon mic. For acoustic guitars without built-in preamp/pickup systems, try a small-diaphragm condenser about 6" from the sound hole, slanted towards the top edge of the fretboard. Bass guitars are frequently covered with a D.I. (direct injection) box, but if miked, the same type of mic used for kick drum would be preferred.

guitar center professional, live sound, microphones, gc pro
There are many mics that can be used for miking guitar amplifier speaker cabinets, like the Royer R-122 MKIIL and the Sennheiser e906. Miking live acoustic guitars is a little more challenging; try out the Shure SM81, Neumann KM 184, or the Mojave Audio MA-101fet.

Piano: To cover the full range of a grand or upright piano, you need a pair of mics, usually small-diaphragm omnidirectional condensers. Best placement is inside the lid, about a foot from the strings and about the same distance away from the hammers, one covering the bass strings and the other handling the treble strings. Remember the "3-to-1 rule" when placing these mics.

The final tip is to use your ears and adjust mic positions to try and solve problems before resorting to EQs or plug-ins. The better you get it to sound without adding processing, the better the final sound will be.

Tuesday, November 8, 2016

Signal Processing for Stage: Dynamics

This "Application Series" article gives advice toward the specific areas of business serviced by Guitar Center Professional, including studio recording/film sound, live sound, house of worship, clubs/restaurants, business sound/lighting systems, and more.


The proper use of signal processing in many settings can be confusing even for experienced engineers. To be clear, there are creative uses of signal processing with effects like reverbs, delays and more, but we won’t be getting into that here. Instead, we’re taking a look at one type of signal processing that’s necessary for a positive audience experience (and the safety of your sound system) -- dynamics processing.

Getting Dynamic with Compressors
The easiest way to understand what a compressor does is to imagine a tiny little audio engineer who lives in a box. His or her sole job is very clear: to keep the perceived volume (loudness or quietness) within a certain range. Our imaginary little engineer has incredibly fast fingers that are always on a fader, and can react faster than any real human to adjust the signal up or down, keeping it within a range that sounds good for the overall performance.

Let’s look at a specific example. In a rock band, not all sounds are created equally. A bass player can be thumping along and then decide to start slapping in the chorus, creating a much higher perceived volume. A singer can be practically whispering throughout a verse, and then start screaming his way through the bridge. You get the idea. Music itself is dynamic, and we agree that using a full dynamic range is a good practice! However, we’ve all been through the unpleasant experience of hearing a poorly-mixed band, where the drums overwhelm the rest of the music, or the vocals can’t be heard at all over a feisty guitar player. What compression does is help even out the volumes of these individual sources so that the live sound experience is a little bit closer to the smoothness of recorded music.

Compressors are the key to creating this professional live sound presentation. They are particularly important for sources that have the highest levels, such as kick drums and bass. They are also crucial for sources with the widest range of dynamics, like the human voice. Please be aware that a compressor is not just a limiter, which is a device that stops audio signals from going above a certain range. Compressors also can raise the level of quieter sources so they, too, can be heard clearly.

Finally, from a practical point of view for live sound, compressors can be crucial to protecting the rest of your live sound system. A sudden burst of a very loud signal can damage everything from your console or mixing surface to your entire main PA and stage monitoring system, as well as having a deleterious affect on the audience’s ears. It’s very important to use compression for this reason, if no other.

Under Control
One interesting thing about dynamics processing: if a high-quality compressor is set correctly, you shouldn’t hear it working. It will just do its job, and everyone will appreciate its work (whether they notice it or not). Let’s take a look at what kind of controls are offered on a typical compressor, and how they work together.

“Threshold" allows you to tell the compressor the level at which it can start reducing the amplitude of a signal. “Ratio" lets you set the gain reduction with a ratio. Example: a 3:1 ratio means that if the signal is 3dB over the threshold you set earlier, the output will be 1dB over the threshold. "Attack and Release” lets you control how quickly the gain reduction starts and stops working. “Knee” allows you to choose how the compressor responds to signals that cross the threshold. Finally, "Output Gain” or "Makeup Gain” takes the compressed signal and boosts it so you have the right amount of volume to fit into the mix.


The dbx 166XS, an affordable dynamics processor that's popular in live sound, shows many of the common controls of a compressor including threshold, ratio, attack, release, and output gain.

Plug It In, Plug It In
For a long time, live sound was an area where only hardware devices were trusted for their essential purposes. However, like most other areas of professional audio, software-based plug-ins have made their foray into live sound in recent years. Technology such as Avid’s VENUE live sound systems have allowed performers and engineers to take advantage of the software-based signal processing that they use in studios while playing live. Companies such as Waves, McDSP and others have created software-based dynamics processing plug-ins that work exceptionally well.

Recommended Dynamics Processors


Dangerous Music Compressor


Software-Based Live Sound Processing Bundles


FAQ

Can’t I just have a single compressor that covers the entire mix?
While it’s important to have a compressor available for the complete mix as needed, each source is different in terms of its need for compression. Some instruments and vocalists might not need any compression at all. Others (kick drum, bass, often vocals) need their own types of compressors, each with their own settings, for a professional stage sound presentation. Also, different players tend to play… differently. Some hit the drums or strings harder; others don’t. It’s a wise plan to have compression available based on the style of the player, rather than an overall plan based only on the types on sound sources.

I once used a compressor and it made everything sound terrible!

As we said above, compression is perhaps the most misunderstood tool in the audio engineer’s arsenal. Two things can cause a compressor to do more harm than good: the use of a poorly-made, cheap compressor which doesn’t have enough quality in its parts or design to meet your needs, or (more likely) having an inexperienced engineer who doesn’t understand how to best set a compressor for each source and/or the mix itself. The most common way to mis-use a compressor is to overuse it. Be conservative with your approach to compression, and it will be your friend.

Can software-based dynamics processors really be trusted for live sound applications?

Live sound—both touring and fixed installations—was one of the last holdouts for use of software-based processing, especially for needs like compression. However, over the last decade or so, plug-ins have proven themselves in the largest venues and most high-profile tours. It’s safe to say that if you want to build a system that uses either software exclusively or in combination with hardware gear, you can trust these tools on your most important live sound jobs.

For more information on live sound processors, consult your GC Pro rep. Visit www.gcpro.com to find your local representative.

===

About Guitar Center Professional/Guitar Center
Guitar Center Professional is the outside sales division of Guitar Center that focuses on the needs of professional users. Its clientele includes recording studios, audio engineers, producers, recording and touring musicians, live sound venues, post production facilities and more. Emphasizing extraordinary individualized service via local account managers, GC Pro offers expert consultation and a comprehensive selection of the world’s finest equipment for music and audio professionals. More information on GC Pro can be found by visiting www.gcpro.com.